Wednesday, 21 May 2014

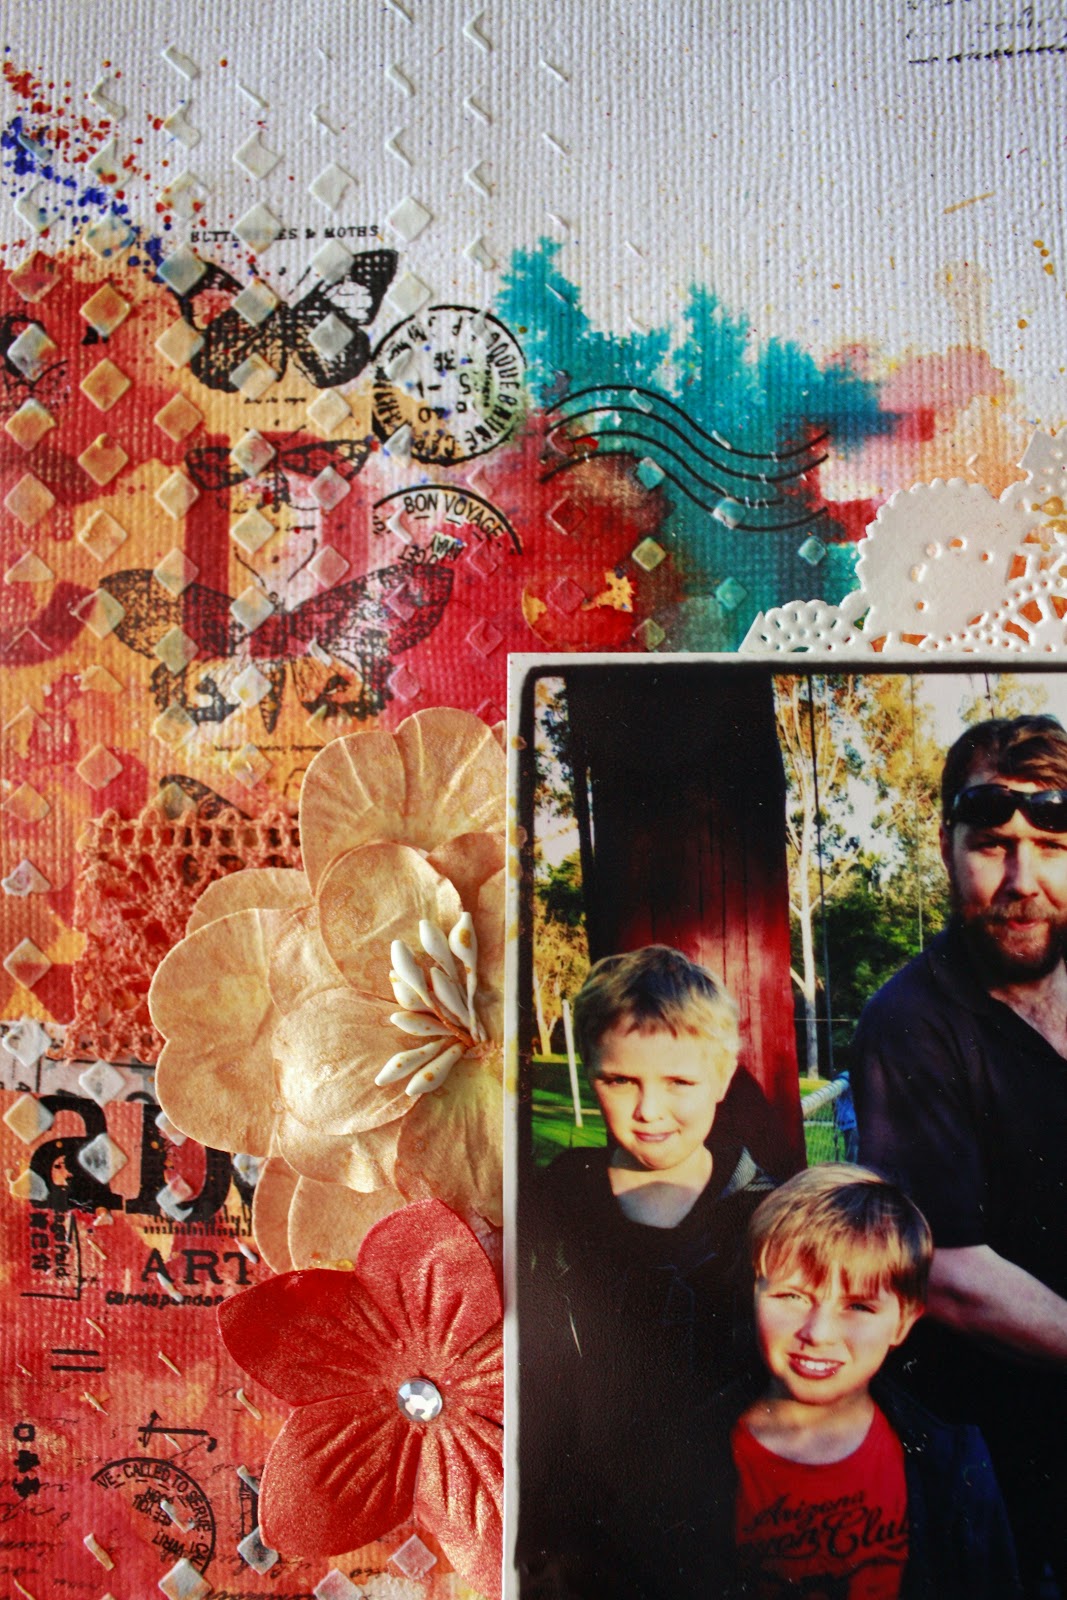
Happy Day by Dana Tatar


Hi! Dana here today sharing the layout I created for the Berry71Bleu May "Simple Pleasures" Challenge, which is sponsored by Molossi. I have a large flowering tree in my front yard that looks and smells amazing right now. I love to site on my front porch, in the shade of this gorgeous tree, and drink a cup of coffee while I read. The flowers smell divine and I can usually hear the birds singing and bees buzzing. I try to take a small timeout during the day to just relax and recharge outside.


The pink flowers from the Darkroom Door Bright Blossoms Montage were the perfect supplement to the large photo that I took. I tucked them into my floral clusters, beautiful Manor House Creations flowers.


I added a sentiment to my photo that I cut from the Darkroom Door Venetian Wordstrips.


I built my layout on a background that includes some of my favorite things; stamping, texture paste, hand-dyed ribbon, letters, book pages, and Molossi Sticky Bling.

Thanks so much for stopping by today! I'll be back next month sharing a fun altered project!

http://www.molossi.com.au/online-shop/#!/~/product/category=6949146&id=29521418 http://www.molossi.com.au/online-shop/#!/~/product/category=6949224&id=29521562 http://www.molossi.com.au/online-shop/#!/~/product/category=6949224&id=29520281 http://www.molossi.com.au/online-shop/#!/~/product/category=8450923&id=32885478 http://www.molossi.com.au/online-shop/#!/~/product/category=8477034&id=32885596 http://www.molossi.com.au/online-shop/#!/~/product/category=6949267&id=29521251 http://www.molossi.com.au/online-shop/#!/~/product/category=8450950&id=32885299


Photobucket

Monday, 19 May 2014

MOOD BOARD INSPIRATION


Good Morning, Rikki here with another post for the start of  the week. Today I thought I would share with you my interpretation of the Molossi Mood Board. I have to share with you, it was for me a little intimating to do the board as I really enjoyed creating it but then having to translate it and do it justice scared me. But now that I am on the other-side of this I am so beyond happy with the results.


Whenever I start to interpret any mood board challenge, I always look at the colours first, it gives me the perfect start point, nothing better than blue and orange together. I then look at the textures and shapes, remember you don't have to add everything you see on the board to your layout.
 

Now of the background I wanted the colours to pop!!! Rangers Dylusions are the perfect thing for this, to give it a water colour effect mist water on your page first to make it run when you spray it with Dylusions, if your not feeling that brave, still mist the water and paint your Dylusions on with a paint brush.


Now onto building the background up, add your contrast colours once your first colour is dry, remember Dylusions will always stay water soluble each time you wet it sometime the colours will run and bleed together making the colours ''dirty'' I use an ear bud where it starts to get ''dirty'' to clean it up a bit. 


Now its onto the stamping for the black to stay crisp you need to use an archival ink like Rangers Archival Jumbo Ink pad. I wanted a distressed look, to achieve that I didn't mount my stamp to a block...... once you are happy with the look its time to add a template and ink with Rangers Tim Holtz Distress ink - Barn Door, ink all over where you have placed your mists, making sure that this isn't  meant to be perfect, just keep it random.


Once you have done the last step its about adding random pieces of Washi Tape throughout the background, followed by picking another template like Kaisercraft 12x12 Template  and use some Impasto Medium  or gesso over the top of all the area.

That's your  background completed now its about adding your photo/s and embellishments like your Manorhouse Creations flowers, remembering if you don't have they right colours you can use your Dylusions to tint or change the colours of them to blend with your layout. 

Dylusions Ink Spray - Squeezed Orange
Archival Jumbo Ink Pad - Jet Black
Washi Tape Design # 33
Distress Ink Pad - Barn Door

12x12 Template - Diamonds


So why dont you give the Molossi Mood Board a go and go in the chance to win an awesome prize pack valued at $40, to check out the rules and regulations just follow the link here:

http://molossidesigns.blogspot.ie/2014/05/molossi-news.html

Till my next post have a creative day. 
Rikki 
xxxxxx


Photobucket

Sunday, 18 May 2014

THANK YOU PAPER BAG CARD BY SARA


Today I wanted to share my second Design Team Project using Molossi Chipboard... I love these designs, they are so easy to alter and take mediums well...
I made this Mother's Day card its called a Paper Bag Card.. I made it from a simple brown paper bag... I like that you get a lot of space and pockets to tuck things into..
I created this for my mum so I wanted it to be as special as she is to me...
I have used Kaisercraft Hidden Treasures Paper collection and the matching collectables I have used this throughout the whole card.. I have distressed all the edges, layered and masked using homemade texture paste..
I then started to cluster the middle using Kaisercraft flowers, Flowers , diecuts, Metal, lace and bling
After that I altered my chipboard using Chalk Inks and Viva Décor Inka Gold in Gold.. I have used for this card the Fluer De lis, Thank You title , Love hearts and Cupids chipboard from Molossi they are the cutest designs...
After that I then went over the whole piece with Viva Décor Inka Gold in Gold think it just finishes the project off I like to go around edges of paper, texture in the chipboard and also the edges of my flowers...
   

Inside Page 1:

I have created a pocket using the Brown paper bag and decorated it using the same papers..
I have added a heart and small doily to make it stand off the page..
I wanted the pocket to be a photo matt I have stamped, embellished and layered it on the one side.. On the other I have added a picture that was taken at my 21st birthday..
The photo matt can be removed if needed too..
 

Inside Page 2:

I have kept this page simple this is for me to write my personal message..
I have again layered paper, diecuts, stamped "Happy Mother's Day", flat flowers, butterfly, floral flourish and collectable...
I decided instead of having a big pocket on the side panel I would stick it all together..


Back Page:

Again I have kept this simple by layered Hidden Treasures Scraps and my logo


Some Close ups of the chipboard and ways you can alter them to suit your projects


On the chipboard I just went over them with gesso then heat set let it bubble , chalk inks blended with my finger and went over the edges &bumps with Viva Décor Inka Gold In Gold


  Photobucket

Saturday, 17 May 2014

LIVE YOUR DREAMS BY CATHI


Hi! Cathi here with a new layout featuring the gorgeous Molossi Cobblestone Fence chipboard and lots of Distress Paints, Stains and Inks from Ranger.


The chipboard fence and the retro dots stamp behind the photo were both painted with Antique Linen Distress Paint. The butterfly stamp was inked with Shaded Lilac Distress Ink and the Banner was stained with Dusty Concord Distress Stain then aged with a light coat of the distress paint and stamped with a script stamp in Walnut Stain Distress Ink. 


My title and butterflies were stamped with Jet Black Archival Ink. All these can be found in the Molossi store, so many amazing products and brands!!


Cobblestone Fence 2 PackDistress Paint - Antique LinenDistress Ink Pad - Shaded LilacDistress Ink Pad - Walnut Stain Distress Stain - Dusty Concord Archival Ink Pad - Jet Black

Photobucket

Thursday, 15 May 2014

MOOD BOARD CHALLENGE INSPIRATION

Good Afternoon everyone,
It's Honor, and wow it's cold here today .... bbrrrrr.  It's a great day to scrap and blog. 
So, last week we introduced you to the Molossi Mood Board Challenge for the month of May, and I'm here today to share my interpretation with you all.
Firstly, here is the mood board ....


And, here is my interpretation card ....


We'd really love you all to play along, and anyone can enter.

We accept scrapbook layouts and canvases. We also accept art journal double spread pages or single art journal pages, along with cards and off-the-page creations. We do not accept digital entries, ATCs, or tags.

Please create unique entries for this Mood Board Challenge. Entries must not be submitted for any other online challenges and they are not to be combined with other challenges.

You need to be a blog owner to play (so you can link up to your blog). Please do not link up to galleries, as commenting is often a problem for our design team. If we are not members of the same gallery we will not be able to gain access to your work easily to leave comments.

Please link up your project via the InLinkz tool on the 
Molossi Blog. Do not link to your entire blog, as this makes it difficult to find your post and could therefore could result in us being unable to comment on or judge your entry.

This challenge is open to Australian and International contestants! The prize is a $40 product pack plus postage. Judging will take place after the close of the challenge by the design team. All decisions are final.


Photobucket

Wednesday, 14 May 2014

WONDERFUL WAYS WITH WASHI AND SMALL COMPETITION

Marelle back again, this time with many ways to use washi tape!


Molossi stocks gorgeous Washi Tape!

One of our fabulous DT members has over 300 washi rolls and this is her storage which I think it fantastic way to store them!!


Make an interesting background with wash tape and cover it with Derivan Gesso available from Molossi as I did in this layout.

There are literally thousands of ways to use washi!
These are just a few I like to create with Washi!

- Border your 12x12 layouts with washi to make an impact
-Use washi tape on a Birthday card
- Cover a small mint tin with washi and place a ribbon bow and fill with M&M's for a Teacher present
- For more texture on your layout, tear washi into tiny pieces and randomly place them on your project
-Give an old wooden box new life by adding washi tape 
-Cover a wooden letter with washi tape and embellish!
-Use washi on school projects


Now I am giving away 3 rolls of Washi Tape to a lucky reader!!
Leave a comment at the end of this post naming 3 different washi tapes Molossi stocks and what you would create with it if you were the lucky winner!!

Good luck 

http://www.molossi.com.au/online-shop/#!/~/category/id=6949237&offset=0&sort=normal


Photobucket

Sunday, 11 May 2014

NUTS ABOUT YOU BY SARA

  Hey guys its Sara today I wanted to share my first Design Team Project for Molossi...


I have made this layout of close family friends using Molossi awesome chipboard... I wanted it to be something special for my first ever layout for Molossi so I tried my hardest and I am so proud of how it all turned out...
   
For the background I have used a number of Lindys Stamp Gang sprays , Ranger Dylusions, masks and texture paste, stamping and textures..

 
I have used Kaisercraft's paper collect On This Day and 75 Cents... Once I had my background complete I started layering my photo mat, tulle and fussy cut flowers..


The flowers are most made but there is some Kaisercraft sage flowers mixed in there. Once my cluster was complete with a lot of fiddling I then added my chipboard from Molossi.. I have used the gorgeous Fleur de Lis and the Numbers up in the left hand corner which stands for the years they have been together... I then went over the whole thing with Viva Décor Inka Gold in Gold.
  
Facebook Page: 
https://www.facebook.com/pages/Just-Cards-By-Sara/303072136454811?ref=br_tf 
  
 Youtube Channel:
https://www.youtube.com/channel/UCJ3EoAela8OTLZqDyxJ8Mjw

Numbers 1 - 10 6cms High  Inka Gold - Gold  Dylusions Ink Spray - Melted Chocolate
 
 
 Photobucket