Showing posts with label Distress Ink. Show all posts

Monday, 19 May 2014

MOOD BOARD INSPIRATION


Good Morning, Rikki here with another post for the start of  the week. Today I thought I would share with you my interpretation of the Molossi Mood Board. I have to share with you, it was for me a little intimating to do the board as I really enjoyed creating it but then having to translate it and do it justice scared me. But now that I am on the other-side of this I am so beyond happy with the results.


Whenever I start to interpret any mood board challenge, I always look at the colours first, it gives me the perfect start point, nothing better than blue and orange together. I then look at the textures and shapes, remember you don't have to add everything you see on the board to your layout.
 

Now of the background I wanted the colours to pop!!! Rangers Dylusions are the perfect thing for this, to give it a water colour effect mist water on your page first to make it run when you spray it with Dylusions, if your not feeling that brave, still mist the water and paint your Dylusions on with a paint brush.
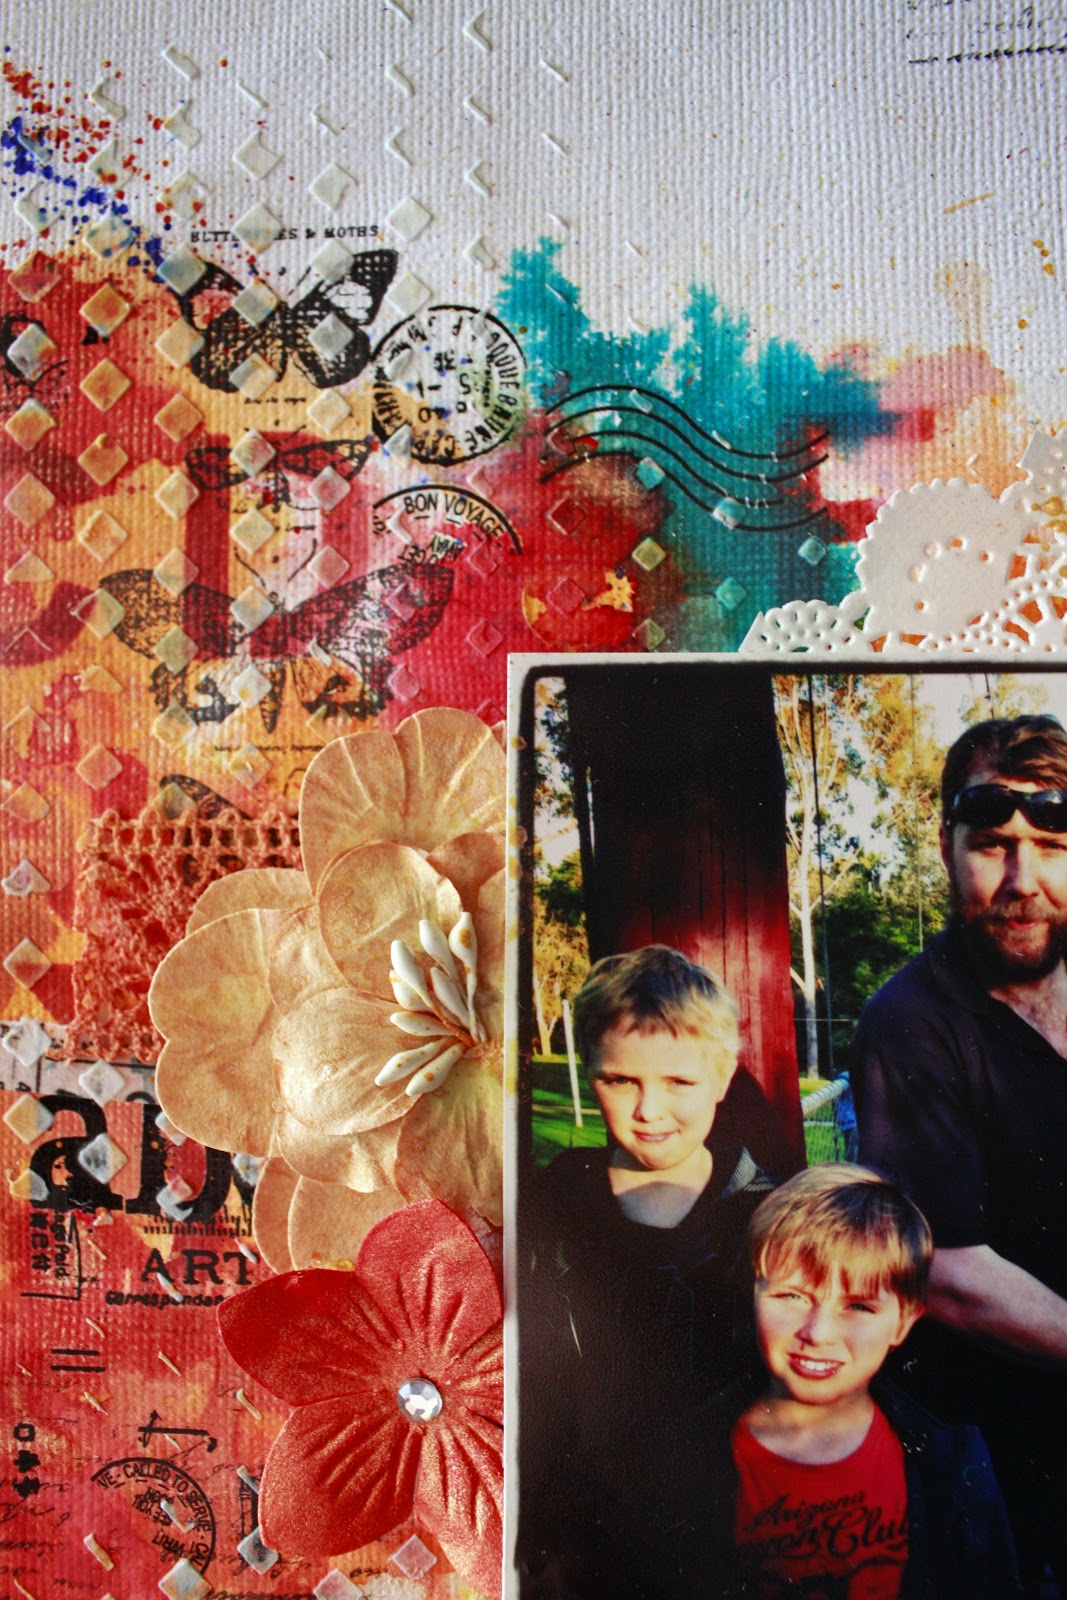

Now onto building the background up, add your contrast colours once your first colour is dry, remember Dylusions will always stay water soluble each time you wet it sometime the colours will run and bleed together making the colours ''dirty'' I use an ear bud where it starts to get ''dirty'' to clean it up a bit. 


Now its onto the stamping for the black to stay crisp you need to use an archival ink like Rangers Archival Jumbo Ink pad. I wanted a distressed look, to achieve that I didn't mount my stamp to a block...... once you are happy with the look its time to add a template and ink with Rangers Tim Holtz Distress ink - Barn Door, ink all over where you have placed your mists, making sure that this isn't  meant to be perfect, just keep it random.


Once you have done the last step its about adding random pieces of Washi Tape throughout the background, followed by picking another template like Kaisercraft 12x12 Template  and use some Impasto Medium  or gesso over the top of all the area.

That's your  background completed now its about adding your photo/s and embellishments like your Manorhouse Creations flowers, remembering if you don't have they right colours you can use your Dylusions to tint or change the colours of them to blend with your layout. 

Dylusions Ink Spray - Squeezed Orange
Archival Jumbo Ink Pad - Jet Black
Washi Tape Design # 33
Distress Ink Pad - Barn Door

12x12 Template - Diamonds


So why dont you give the Molossi Mood Board a go and go in the chance to win an awesome prize pack valued at $40, to check out the rules and regulations just follow the link here:

http://molossidesigns.blogspot.ie/2014/05/molossi-news.html

Till my next post have a creative day. 
Rikki 
xxxxxx


Photobucket

Sunday, 11 May 2014

NUTS ABOUT YOU BY SARA

  Hey guys its Sara today I wanted to share my first Design Team Project for Molossi...


I have made this layout of close family friends using Molossi awesome chipboard... I wanted it to be something special for my first ever layout for Molossi so I tried my hardest and I am so proud of how it all turned out...
   
For the background I have used a number of Lindys Stamp Gang sprays , Ranger Dylusions, masks and texture paste, stamping and textures..

 
I have used Kaisercraft's paper collect On This Day and 75 Cents... Once I had my background complete I started layering my photo mat, tulle and fussy cut flowers..


The flowers are most made but there is some Kaisercraft sage flowers mixed in there. Once my cluster was complete with a lot of fiddling I then added my chipboard from Molossi.. I have used the gorgeous Fleur de Lis and the Numbers up in the left hand corner which stands for the years they have been together... I then went over the whole thing with Viva Décor Inka Gold in Gold.
  
Facebook Page: 
https://www.facebook.com/pages/Just-Cards-By-Sara/303072136454811?ref=br_tf 
  
 Youtube Channel:
https://www.youtube.com/channel/UCJ3EoAela8OTLZqDyxJ8Mjw

Numbers 1 - 10 6cms High  Inka Gold - Gold  Dylusions Ink Spray - Melted Chocolate
 
 
 Photobucket

Wednesday, 19 March 2014

EASTER PHOTO CAROUSEL BY DANA


Hi! Dana Tatar here today sharing an Easter themed home decor piece. I started with a Dusty Attic Photo Carousel and embellished it with colorful patterned paper, Manor House Creations Flowers, Molossi Sticky Bling and some Easter decorations.


This is what the Dusty Attic Photo Carousel looks like assembled and unaltered. The entire piece spins 360 degrees. The two lattice pieces are stationary. The four solid panels (two are shown above) spin 360 degress.


I colored the top and bottom pieces with Vintage Photo Distress Stain. When I think about Easter, the first things that come to mind are white bonnets and baskets, so I colored the two lattice pieces with a White Acrylic Paint Dabber. I set these pieces aside to dry overnight. Note: I left the 4 spinning panels natural because they will be covered with patterned paper.


I colored some Manor House Creations Teeny Weenies Roses with Bubblegum Pink, London Blue, Lemon Zest and Vibrant Turquoise Dylusions Ink Spray.


I cut patterned paper to fit the rotating panels. I embellished 4 panels with photos of my daughters and 4 panels with vintage Easter themed clip art. I added Manor House Creations Flowers and some Easter themed embellishments from my personal stash. I finished each patterned panel with stitching and and a Viva Decor Creme Pearl Pen.


Here are the four photo panels on the assembled carousel.


Rotating each panel 180 degrees reveals the vintage clip art.


Here's a closer look at the floral clusters. The Manor House Creations Flowers in pink and purple are unaltered. The smaller yellow, pink, blue and turquoise roses are the Manor House Creations Teeny Weenie flowers that I colored with Dylusions Ink Spray.


I embellished the white lattice pieces with Manor House Creations Flowers, vine die-cuts, and a triple loop bow. Each intersecting piece of lattice is adorned with a piece of Molossi Sticky Bling.


I had a lot of fun embellishing the top piece of this carousel! This carousel is very strong and I could have piled on a lot more weight without effecting the rotational capability of this piece. I laid down a nice blanket of artificial grass and topped that with eggs, flowers, bows and a resin bunny holding a basket of carrots.


Thanks so much for stopping by today! I'm proudly displaying this piece in my home until Easter, when it will be the highlight of my brunch centerpiece!

Molossi Supplies:
Dusty Attic Photo Carousel
Manor House Creations Teeny Weenie Roses - White
Manor House Creations Coordinations - Purple
Manor House Creations Layout Pack - Chic
Manor House Creations Razzles - Pink
Manor House Creations Razzles - Purple
Manor House Creations Vine - White
Manor House Creations Peacock Feather - Pink
Manor House Creations Peacock Feather - Purple
Manor House Creations Lace Butterflies and Hearts
Sticky Bling - Rainbow
Sticky Bling - Lilac
Sticky Bling - Hot Pink
Viva Decor Pearl Pen - Creme
Vintage Photo Distress Ink Pad
Vintage Photo Distress Stain
Dylusions Ink Spray - Bubblegum Pink
Dylusions Ink Spray - Lemon Zest
Dylusions Ink Spray - London Blue
Dylusions Ink Spray - Vibrant Turquoise


Photobucket