Showing posts with label Kasiercraft. Show all posts

Monday, 19 May 2014

MOOD BOARD INSPIRATION


Good Morning, Rikki here with another post for the start of  the week. Today I thought I would share with you my interpretation of the Molossi Mood Board. I have to share with you, it was for me a little intimating to do the board as I really enjoyed creating it but then having to translate it and do it justice scared me. But now that I am on the other-side of this I am so beyond happy with the results.


Whenever I start to interpret any mood board challenge, I always look at the colours first, it gives me the perfect start point, nothing better than blue and orange together. I then look at the textures and shapes, remember you don't have to add everything you see on the board to your layout.
 

Now of the background I wanted the colours to pop!!! Rangers Dylusions are the perfect thing for this, to give it a water colour effect mist water on your page first to make it run when you spray it with Dylusions, if your not feeling that brave, still mist the water and paint your Dylusions on with a paint brush.
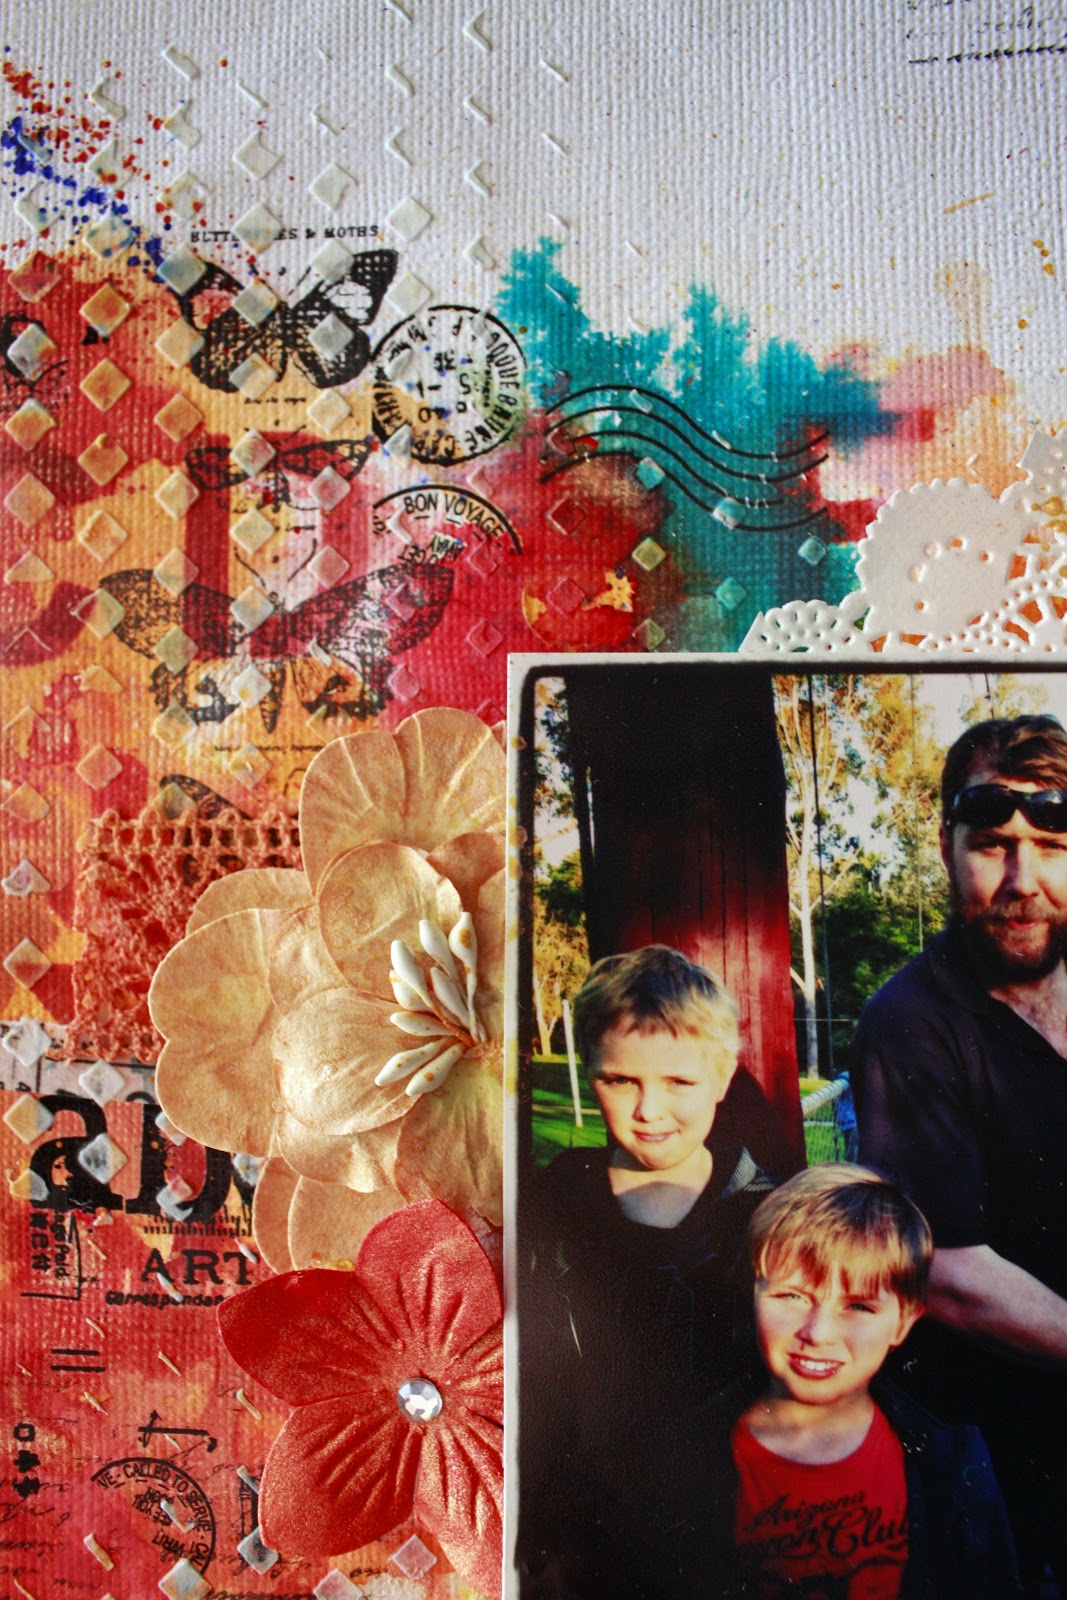

Now onto building the background up, add your contrast colours once your first colour is dry, remember Dylusions will always stay water soluble each time you wet it sometime the colours will run and bleed together making the colours ''dirty'' I use an ear bud where it starts to get ''dirty'' to clean it up a bit. 


Now its onto the stamping for the black to stay crisp you need to use an archival ink like Rangers Archival Jumbo Ink pad. I wanted a distressed look, to achieve that I didn't mount my stamp to a block...... once you are happy with the look its time to add a template and ink with Rangers Tim Holtz Distress ink - Barn Door, ink all over where you have placed your mists, making sure that this isn't  meant to be perfect, just keep it random.


Once you have done the last step its about adding random pieces of Washi Tape throughout the background, followed by picking another template like Kaisercraft 12x12 Template  and use some Impasto Medium  or gesso over the top of all the area.

That's your  background completed now its about adding your photo/s and embellishments like your Manorhouse Creations flowers, remembering if you don't have they right colours you can use your Dylusions to tint or change the colours of them to blend with your layout. 

Dylusions Ink Spray - Squeezed Orange
Archival Jumbo Ink Pad - Jet Black
Washi Tape Design # 33
Distress Ink Pad - Barn Door

12x12 Template - Diamonds


So why dont you give the Molossi Mood Board a go and go in the chance to win an awesome prize pack valued at $40, to check out the rules and regulations just follow the link here:

http://molossidesigns.blogspot.ie/2014/05/molossi-news.html

Till my next post have a creative day. 
Rikki 
xxxxxx


Photobucket

Wednesday, 23 April 2014

A QUICK CARD

Hi, it's Honor here.
 
Recently I needed a quick card for a friend.  She isn't an overly "girly" girl, so I thought the Kaisercraft Base Coat range would be perfect for the occasion.
 
I kept it quite simple, using ribbon pieces from the Base Coat range, Flourish With A Bling "Grace Pewter" embellishment and a very cute butterfly "Critters".
 
The cogs and clocks were from my stash, with a little piece of Green Tara Paper String.


Thanks for stopping by.  Don't forget to check back here regularly to see more amazing inspiration from Molossi's awesome DT.
 
Honor xo
 
 
Photobucket

Wednesday, 16 April 2014

DREAM CARD BY HONOR

Hi, it's Honor here with a quick card I've created using lots of goodies that can be found in the Molossi online store.
 
I've used the Kaisercraft Base Coat range to make this card, with the base made from cream cardstock.


The flowers are from the Manorhouse 'Melissa' range, embellished with Flourish With A Bling.
 
"Dream" is a pre-cut Manorhouse word, available in both black & white and can be coloured to suit your project.
 
I hope you're all having a lovely day, and find some time for creating today.
 

Thanks for stopping by,
Honor x

Photobucket

Friday, 28 March 2014

HOW MUCH IS TOO MUCH?

Hi, Rikki here to share with you a layout that I love and now is apart of my scrap wall display. Its not my usually arty or fussy cut layouts but it has an elegance to it that I just love ( well at least I think it does). 

You sometimes don't need a heap of embellishments to show case you photo, so how do you know how much is too much?


The first thing I started with, for this layout was the Manorhouse Creations  Vine. I love the vines because you can shape them in the direction that you need them to go. I wanted a semi circle shape to wrap around my photo.


The next step; I wanted to add some bulk to the Vine and some contrast. So from another packet of Manorhouse Creations flowers I used white as the contrast colour to tie my light house to the layout. Then I used a couple of  Manorhouse Creations Teeny Weenies Roses through the spray of flowers (its all about the finishing touches).


When mounting a photo on some background paper I don't always want the bulk from foam mount especially when I have a vine on the layout. To add layers and depth I use one piece of double sided tape and a stapler, this allows you to curl the edges of your pattern papers = instant depth in your layers.


For the title I wanted my Kaisercraft rub on to take a more aged look.... when you rub it on move the top layer a little bit it will make it crack and give you this worn look. 

For the finishing piece for the layout , I wanted some movement, this is where the beautiful Flourish With A Bling  Chloe pearl flourish was perfect for that, it was like a wave!!! It tied in with the picture of the lighthouse. These flourishes are really easy to put down and you can cut them to customize them with  your page.

And thats it the page for me is finished, anymore embellishments would have been too much..... Time to step away from the layout and admire it.


Vine - light blue
Vine - light blueTeeny weenies roses 36pcs
Teeny weenies roses 36pcs
Explore Rubon Word
Explore Rubon Word
FWAB Chloe Pearl Flourish Blue

I hope you enjoyed my post today, and that you can go into your stash and create a timeless layout or better still why dont you pop over to the Molossi store and grab yourself some of these yummy embellishments.

Rikki xxxx
Photobucket

Friday, 21 March 2014

REUSE OR MAYBE ITS A CASE OF HOARDING

Good morning all... Rikki here on this fine Friday. Today I thought I would share with you a mixed media layout that uses your plastic bags from when you buy your lovely Manorhouse Creations flowers.... now you wont be throwing them out!!! Keep them and reuse them. 

Mind you might want to keep it a secret from the other halves in our lives, because I think mine thought I was off my trolley when I was telling him not to throw out the empty packaging. That or he thought I would need to go on Hoards, officially now, I could just see his brain tick over.... ''you have enough scrapbooking supplies, why are you using the plastic bags?" 

Ahhhh, that I do but little does he know..... lol.


Where to start? I usually start with a little bit of  
Derivan Paints & Mediums Gesso, swiped over the background where I want my mists to go (I just use whats on my desk..... usually the backing from my flowers). Allow to dry.

Now with your left over plastic packaging , brush a little bit of your mist on it.... I started off with Heidi Swapp Colourshine. Place it over your gesso and squash it down. Repeat till you get the coverage that you are after. Dont forget to flick a few spatters around and allow to dry.

Once its dry we are repeating the same technique as above with the Dylusions, while they are still wet use your Dusty Attic Mini Spritz Bottle with water, and bleed out the Dylusions a little bit you can also use your plastic bag to push it around at this stage. Allow to dry, once your happy with the results and also dont forget to flick a few spatters.


Now you can built your layout, I used some stamps just remember to use some Archival Ink Pad  so it wont run into your colours. Another great thing to use is the Kaisercraft Rubon words for an instant title.


Gesso 500ml
Gesso 500ml
Dylusions Ink Spray - Calypso Teal
Mini Spritz Bottles
Mini Spritz Bottles
Archival Ink Pad - Jet Black
Explore Rubon Word
Explore Rubon Word
Also another product that I a secretly excited about in the store is the new 12x12 Bazzill Card Shoppe Cardstock 250gsm, it is perfect of those of us who love mixed media and not the buckling that happens when we create our backgrounds. Why dont you pop over to the store and see the stunning colours it comes in and grab yourself some today.

I hope that has inspired you to keep and reuse your left over packaging.... if you give this a go it would be great if your could share a link in the comments and the team will go and have a look.

Till next week I hope you have a great creative weekend.

Rikki
xxx
Photobucket