Friday, 21 February 2014

WITH LOVE CARD BY HONOR

Hi everyone, it's Honor here with  some card inspiration.
This is my first contribution as one of Molossi's newest DT members, and I was so excited to receive my first DT pack.  I couldn't believe my luck when I opened it to find it full of one of my favourite colours - PINK !!


Here are the products I used to make this card;
* Base card is Kraft cardstock
* Embossed pink & white paper - cut with Spellbinders Hexagon die
* Manor House Floral Mix "Melissa" and coloured with "Tutu Pink" Glimmer Glam
Other products used;
* Kaisercraft Rhinestones
* Tim Holtz 'Walnut Stain' ink

I look forward to bringing you more cards and showcasing the beautiful products available at Molossi.
 
 
Photobucket

Thursday, 20 February 2014

TRUE LOVE LAYOUT BY GDT CONNIE


Today we share February GDT Connie Hall's first layout, a gorgeous wedding layout called "True Love".


Here you can see a close up of the gorgeous Molossi Ornate Fence chipboard she used. The raw chipboard was whitewashed with gesso and she added pearls.


The chipboard can be cut easily so Connie split hers so that it would be a feature across the page on either side of the photo.

Molossi Product Used: 
Divine Fence
Photobucket

TWO NEW PROJECTS FROM GAIL

Gail has sent through some gorgeous projects this month!


Check out this beautiful vintage layout featuring our gorgeous Garden Bench chipboard.


This lovely wedding album uses the Birdcage #4 Chipboard!

Birdcage # 4
Photobucket

Wednesday, 19 February 2014

WISHING WELL BY JO


Hello, Jo here again this month! I will apologise in advance for the number of wedding related posts you are going to see from me in the coming months.  My little brother finally tied the knot in December and I was lucky enough to be asked to do the little things that add to a special day like the invitations, wishing well etc.  My little girl was blessed with being one of the flower girls along with my two beautiful nieces.  So, as you can imagine I have a HUGE pile of photographs waiting to be scrapped.

However, today I thought I would show you the Wishing Well as it’s raw version is a Molossi product If you have a wedding coming up or perhaps you make invitations for people as a little business and wish to hire out a well – this could be right up your alley!

The wishing well is laser cut from 12mm MDF and stands 80cm high.  The actual box part of the well is 40cm wide and 30cm high.  When you receive the well it comes in 8 flat packed pieces.  It is really easy to assemble and in fact I decorated mine in pieces and transported it flat from Qld to NSW for the wedding as I didn’t have a great deal of room in my car.  I simply put it together the night before the wedding by tapping the lugs into the correct holes.  To transport it home I simply pulled it apart and brought it home flat packed also J  You can glue it for extra strength but I found this really wasn’t necessary.  It is a very sturdy well and at no stage has it ever looked like it might separate.

Now I’m blessed with a husband who is a spray painter, so I took the raw pieces to him and had him spray them and clear coat them in 2pac car paint!  I knew that no amount of knocking around en-route to the wedding would damage them this way and I simply wrapped the pieces in cloth to avoid any scratches.  However, the edges are black due to the laser cutting and it takes more than a fine mist of paint to cover this.  Out came my trusty Adirondack acrylic paints ( I found a pearl colour which was an exact match to the white pearl paint hubby had used) and two coats with a paint brush on the edges and all was covered perfectly.  As the paint was pearlised and therefore had a sheen of it’s own and it was just the edges,  I haven’t bothered with any clear lacquer over the top.  However,  if you don’t have access to a painter friend and are doing the whole project in acrylic paint I would suggest you then cover in a clear gloss to give your well a shine and protect the paint.
I then ran a fine line of Helmar 450 glue (this stuff sticks ANYTHING) along the edges of the well and added some sticky bling runners also from Molossi.  These runners come in a huge range of colours and even pearl runners – check out this link to see all of them .  Now whilst these are self adhesive, I found that without a bit of added adhesive help the heat affected them and they peeled off.  A quick touch of glue beneath them and they are there for life.  

My final touches was simply a piece of ribbon in the bride’s colour scheme to complete the look. 


 Simply change the colour of the ribbon and perhaps place the bride’s bouquet on the table beside it back at the reception and you have a whole new look.


The lid with the slit in it lifts easily on and off the box allowing you to remove the cards left there by guests at the end of the evening.

If you do have an upcoming wedding, I urge you to pop over to the Molossi shop and check out the huge array of products that will help make that special day even more special.

I’m just waiting  on the official photographs to come back so I can share more of the wonderful Molossi MDF goodies with you – stay tuned.

Large Wishing Well 80cm HighSticky Bling Runner 5 Pack Rainbow450 Quick Dry Adhesive Bottle 125ml


Photobucket

Tuesday, 18 February 2014

TIME FLIES CANVAS BY CATHI


Cathi here with another fun project I created for Molossi, a mixed media canvas !!  I had a GREAT time spraying and misting and stamping and using molding paste, gesso, embossing powder...


I sprayed my canvas with Lindy's Stamp Gang Starbust Spray in Tibetan Poppy Teal, my favorite color, and then added in a bit of brown Opal Sea Oats. I used Sepia Archival ink to do my stamping and used the numbers, gears, shattered glass and Time Flies stamps from the set as well as the great clock. You can see the amazing dual red and purple tones on the Razzleberry Plum embossing powder from Lindy's on the 
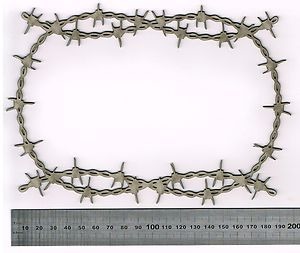
Molossi Barbed Wire Ornate Frame Large. I have also colored in the Molossi Dove with gesso and the sprays. I took two cogs from the Cogs #1 set and embossed them in silver and also cut them in half to add to the canvas edge.


I added a purple Manor House Creations Razzles flower cut in half and placed at the edges of the canvas. Above you can see where I used molding paste to do a clock stencil design. I also added some drywall mesh tape to the canvas for more texture and added gesso to that as well. 

Barbed Wire Ornate Frame Large  Cogs Pack #1  Razzles Card pack - Purple
Photobucket

Monday, 17 February 2014

LIFE'S JOURNEY DISPLAY FRAME BY DANA


Hi Molossi fans! Dana Tatar here with you today sharing an altered 12x12 Display Frame. This piece was quick and easy to put together and a fun way to display some of the photos from my wedding! The colors for my wedding were black and white, but my bridesmaids carried bouquets of bold tropical flowers. The brightly colored Manor House Creations Flowers and Dylusions Ink Spray I used to alter this frame really take me back to my special day a little over 10 years ago. I topped this frame with a beautifully designed piece of Molossi Chipboard.


I used a paintbrush and Dylusions Cherry Pie Ink Spray to color the the top layer of the Display Frame.


Once the frame was dry, I attached several photos to the back of the frame.


I covered the back of the frame with Kaisercraft patterned paper that complemented the flowers and leaves I planned to add as embellishments. My largest photos were slightly smaller than the opening in the frame, so I covered the empty space by wrapping a piece of ribbon around the frame.


I colored white leaves with Cut Grass and Fresh Lime Dylusions Ink Spray.


12 x 12 Display Frame  Joining Us Together  Felicity  RAZZLES - pink  Teeny weenies roses 36pcs  Lace Butterfly & HeartsDylusions Ink Spray - Cherry PieDylusions Ink Spray - Cut GrassDylusions Ink Spray - Fresh Lime

Photobucket

OUR LITTLE R.A.K. FOR THE FIRST 3 COMMENTS ON 16TH FEB

Hello everyone,
Could Lainie Michel, Natasha and Jean email me at marellejackman@gmail.com with your postal addresses for your little RAK from Molossi Please 
Congratulations ladies


Photobucket