Saturday, 31 May 2014

SIMPLE JOY BY CATHI


Being out in the garden with the girls is a pleasure for us. We don't have great green fingers but enjoy growing a small amount of vegetables each year in the back garden and the girls love to help. Here they are picking lettuce leaves for a salad.... I thought these Darkroom Door Bright Blossoms Photochips fit my theme perfectly. I cut out several images and layered them under my photo. 


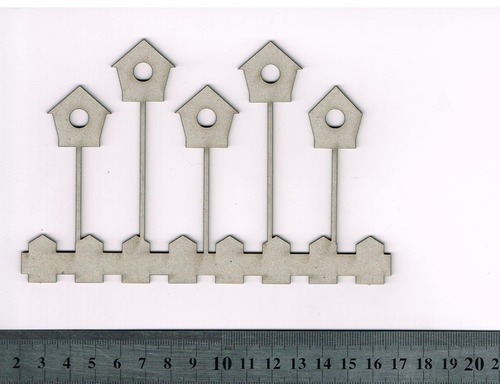
I used the gorgeous Molossi Fenced Birdhouse, embossing it with dark orange and yellow embossing powder for a mottled effect.


I have added mesh tape, and lots of misting and masking as well.  I really enjoyed using my mixed media goodies to make this, even though I had to add one 3D flower to the mix as well!! Thanks so much for looking!!!


Fenced Birdhouses  Photochips - Bright Blossoms

Photobucket

Monday, 26 May 2014

LIVE THE LIFE YOU IMAGINED BY CATHI


Hi Cathi here with another layout for Molossi! This time I took some unusal colors for a sea themed layout and had fun with them, featuring Molossi chipboard, Manor House Flowers and Ranger Distress Ink.


Here you can see my gorgeous Molossi Banner Chipboard, simple but such a great effect on the layout, great feeling of movement you can get with these. I used Ranger Distress Paint in Fired Brick, edging it with my Derivan Low Viscosity Gesso.  I embossed the flourish stamp using Ranger Black Soot Distress Embossing Powder and stamped the script stamp using Black Soot Distress Ink.


The gorgeous flowers I used are the flowers from the Manorhouse Creations Razzles Card Pack. I finished off the layout with some shells and twine from my stash. Molossi carries some amazing products in their shop, hope you will come stop by and have a look!!


Low Viscosity Gesso 500mlDistress Paint - Fired Brick
Distress Ink Pad - Black Soot  Razzles Card pack - Red


Photobucket

Sunday, 25 May 2014

CUPID CARD BY SARA

Hey guys its Sara again and today I wanted to share my third Design Team Project for this month for Molossi Chipboard... When I first started I stuck to cards and that's where my confidence grew as time as gone on I have progressed into all types of crafting... I have created this shabby chic card and a little tutorial below... I used one of the new collections from Kaisercraft called Key to my heart..
I have layered some different diecuts so it could give some dimension to my Molossi Chipboard Cupid which is so cute..I went over this piece using some inks and glitter which just makes the piece pop...

Tutorial:

Once I was layered I realised I didn't like the masking and replaced the sheet behind with a new one... I think it over powered it... So I decided to change the background sheet.. 


On this first photo I have layered my paper which I have distressed, I then started creating some layers

I have continued my layering to give it that dimension and to make the chipboard really pop.. I have started adding my embellishments..


I have then coloured my chipboard using ink and glitter...
Adding flowers and leave diecuts... Finishing it off with some pearls and my trademark a butterfly... This is so simple to create but I love how it turned out.. Let me know what you think!!!!
 
To check out the Molossi Store:
http://www.molossi.com.au/
 
To check out the Molossi First Challenge information:
http://molossidesigns.blogspot.com.au/
 
Just Cards By Sara Facebook Page:
https://www.facebook.com/pages/Just-Cards-By-Sara/303072136454811
 
 
Photobucket


Saturday, 24 May 2014

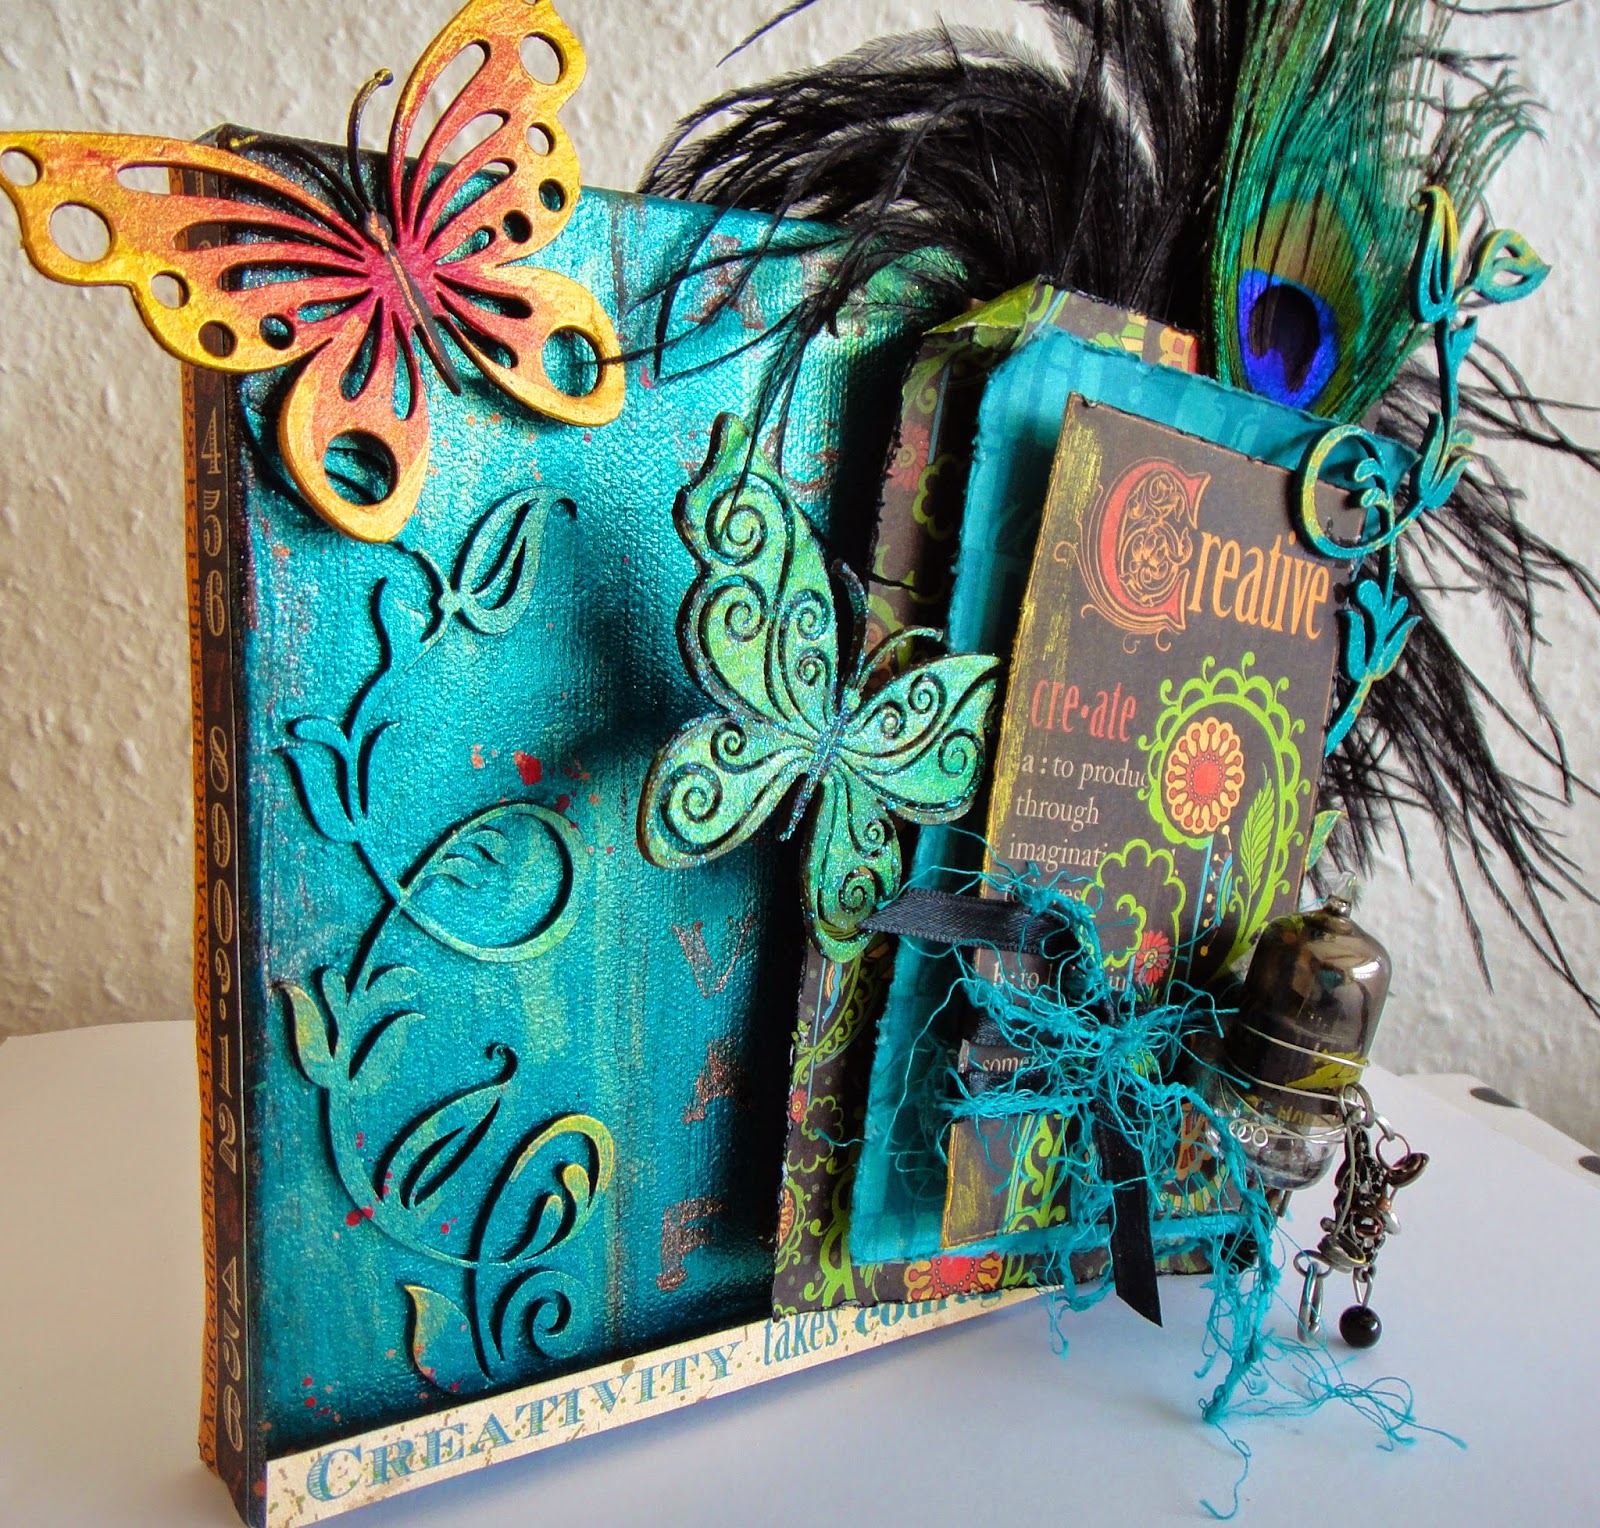
MOLOSSI MOOD BOARD CANVAS BY LEE

Hello there! I am a bit late to the game for the May Mood Board Challenge, but I wanted to share what I have created. There are a few days left in May, so get going on your projects and link-up to our challenge!


I am making my debut today on the Molossi blog with this project:


This is a small 6x6 inch canvas. I gave it a coat of paint to match that wonderful door on the Mood Board.  I also liked how the details were painted the same color as the door. I painted the Dusty Attic Swirly Vines to match the canvas. Next I stenciled the alphabet onto the canvas with Viva 3D Stamp-Paint. 

The tag on my canvas was made using the Graphic 45 Typography collection.  The edges of the papers were colored with Distress Inks in Black Soot and Tumbled Glass, and each layer was mounted with plenty of room in between to tuck in the feathers and other pieces of chipboard. The butterflies are Dusty Attic Flutterbies.  I painted them different colors and gave them different finishing treatments to set them off. Some of the detail work of the butterflies was done with Kaisercraft paint in black. The green butterfly was given a coat of Viva Glitter Paste for some sparkle. The red butterfly's edges were rubbed with Viva Inka-Gold in gold. I also accented some other areas of the canvas with the gold.  

The second vine chipboard, ribbon, fiber, metal bits and vacuum tube were added to the tag.  On the bottom of the canvas I added the quote "Creativity takes courage," by Henri Matisse.  Go be brave and creative! 


The following products can be found in Molossi's online store:


Thanks for stopping by and have a great day!


Photobucket

Friday, 23 May 2014

A QUICK BOY LAYOUT


Good Morning, how are you all? Rikki here today trying not to get blown away with the wild weather over here in Western Australia. Love this weather, winter is finally here and the the rain is the best thing ever. But we aren't here to discuss the weather, today I am sharing with you a quick, fussy cut boy page .

For me I love just adding a little interest with some fussy cut flowers  and lets face it we all have some of them lying around I tend to do a whole sheet of flowers and just use a sandwich bag to store what I don't need for a quick layout later on. Or maybe I am just hoarding? but if hubby asked I am being prepared.....


Don't forget to use a little Foam Mount to help add depth and some height, and you cant go past a strip of Washi tape for a quick boarder strip. My favourite is the the Film Strip.


Why not jazz up a plain tag and use Spellbinders Alphabet Dies to make your own quick title.


12 x 12 Textured Cardstock Blue Boy
Washi Tape 15mm x 10m roll Film Strip
Washi Tape Film Strip
Font One - Lowercase
12mm Foam Tape
12mm Foam Tape

Also I would like to say... Thank you. Thank you to all those who have entered the Molossi Mood Board so far, I can speak on behalf of the design team we are blown away from the entries so far and for those who still want to give it a go you have time and we cant wait to see your entries.

Till next week, have a creative weekend.

 Rikki 
xxxxxx
Photobucket

Thursday, 22 May 2014

USING YOUR LEFTOVERS

Hi,
 
It's Honor here, and today I want to show you some ways to use your left overs or scraps of paper, allowing you to get the most use out of your gorgeous papers.
 
I had a lot of scrap pieces of Kaisercraft's Base Coat range.  I love this range so much, that I couldn't bring myself to throw away any of the scraps !!
 
I decided to make a few gift tags using the left over pieces, and by adding a few flowers, and some embellishments, I now have gift cards ready for anytime I might need one.


Even after making these gift tags, I had more left over scraps, so I decorated this Kraft gift bag as well.  There's always plenty of things you can do with your scraps - what do you like to do with yours??
All the products I've used can be found in Molossi's online store.


Albums


       Manorhouse Flowers
Grace Pearl Flourish
Kraft Bag Medium Brown
Thanks for stopping by,
Honor xo
 
 
Photobucket