Friday, 7 February 2014

FUSSY CUT INSPIRATION

Hi Rikki here and its my first ever post for Molossi and I must say I was super excited about receiving my design team kit, it was the best happy mail and I am sure that the postie is getting over me stalking her, and also wondering what come in these pizza boxes? why do they cause such excitement? well the answer is simple, how can you not!!!


This is a stunning paper range called Butterfly Kisses.... its beautiful if you leave it or if your like me I am a huge fan of fussy cutting and piece a few papers together and its perfect if your on a budget too.
 
 
One tip I would like to share when you are doing fussy cutting especially if it is your first time is not everything needs to be stuck, stuck down, I find that if you tack it down you can go back later and just curl your pieces with you fingers in the edges allowing more depth with out the bulk of foam mount.
 

This range of papers has the perfect touches of bling, little sections of the design have glittered and shiny gloss already done for you. Also for the smaller flowers you can use you hole punch for the perfect circular flower.

 
One of my new favourite things are the Manorhouse Flexible Word Mix.... I love the fact that you have both black and white in the one packet. Don't forget you can mist over them to change the colours to. The are the perfect, quick, elegant, instant title.
 
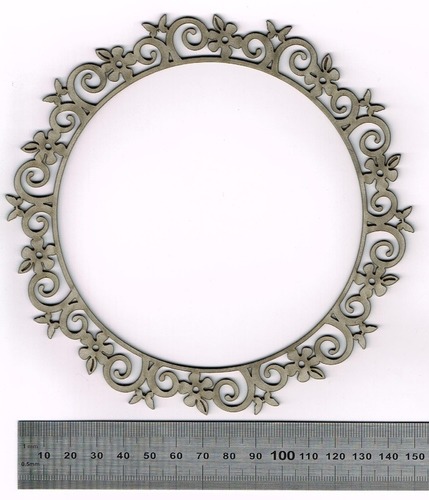
And while you are in store adding those to your cart why not add the Manorhouse Flexible Ornate frames...
 

Flexible words BELIEVE MIX
Manorhouse Flexible words; Believe Mix
 
Ornate frames GOTHIC BLACK
Monorhouse Flexible Ornate Frames; Gothic Black
 
 
12mm Foam Tape
X-press It Adhesive; 12 mm Foam mount

 
So until next week, I hope I have inspired you to get fussy cutting next week I have something special for the Mixed Media artist out there!!!
 
 
Photobucket

Thursday, 6 February 2014

ZOMBIES ARE HEADING OUR WAY!!! BY JO


Hi! Jo here with a new project! I feel like the zombies might have captured me and taken me to another planet over the summer holidays break – it’s been so long since I got to sit in the peace of my scrap room and just play. However, today with the children back to school - I’ve arrived back in the real world – my hands are covered in green and red dye and my scrapbooking table is littered with my tools, paper, glue and of course Molossi chipboard!

Tomorrow is my son’s 9th birthday and somehow we’ve gone from toy trucks to killing zombies on his new X-Box games in what feels like the blink of an eye. His request for his birthday cake is a graveyard with a zombie hand reaching out of a grave, his party is zombie themed and I’ve spent far too much time in the past 48 hours researching disturbing images on pinterest for zombie parties, party favours, decorations and the like.

So it seemed obvious that the birthday card for said birthday should also feature this ghoulish theme. I was lucky enough on my return from down south to have another wonderful package of chipboard goodness on my doorstep from the good folk at Molossi. Included in this pack was the chipboard banners which I have used on this card – now normally I would decorate these with bright colours and hang them from some baker’s twine to bring the feeling of light hearted fun – however, on this occasion colouring them to the ghoulish greens featured in the card and using them to look more like the steps to the dungeon below worked a treat.

My little zombie I simply found on a google search – printed onto white card and coloured with my American Crafts markers and then fussy cut. The background was spritzed with Glimmer Mist and the red “blood” spurt is the Pillar Box Cherry Pie Dylusions Ink Spray.

The little word bubble featuring the happy birthday was created using clip art and adding in the text I wanted. Again, I printed onto white card and fussy cut – mounting it to my card with foam adhesive squares.

The little wooden number 9 in the bottom right corner is a packet of numbers I purchased years ago from a cheapie store – I’ve simply spritzed it also with the Cherry Pie Dylusions Ink Spray to keep the colour the same.

Mat the whole piece in black cardstock and add to my white card base and I was done.

It felt good to be back in the creative groove after my hiatus. Thanks for stopping by and taking a look – I promise the next blog post you will see from me will not be ghoulish. In fact, I have some gorgeous wedding joy to share with you including the amazing laser cut words you can purchase from Molossi made to order – hope you can check back soon and see what I’m talking about – till then – See ya!

Cheers, Jo!


Molossi Products used: 
Chipboard Banners 

DID YOU KNOW MOLOSSI SPONSORS MANY CHALLENGE SITES ??

Hi everyone,
Marelle back again, there are so many wonderful Scrapbooking challenges here in Australia and overseas and Molossi is proudly sponsoring challenge sites throughout this year!  

If you would like Molossi to sponsor any challenge sites in 2015, please contact me at marellejackman@gmail.com.
This beautiful  mixed media canvas is from Kasha Gray who has used Molossi products.  Molossi is sponsoring for February over at berry71bleu.blogspot.com
Kasha has used Molossi bling, chipboard word HOPE, Keys all from our online shop.
To check out the process of this beautiful canvas, go to Kasha's blog:
http://kashagray5.blogspot.com

Photobucket

THANK YOU CARD

Welcome everyone to today's card inspiration. 
It's Honor here, and I can't wait to share this Thank You card with you all.
 
 
* 12 x 12 Molossi Glitter paper in pink & white
* Molossi chipboard mirror
I adhered the flowers & embellishments using
450 Quick Adhesive
Other products I used are;
* White ribbon
* The inside the mirror frame I made a button with the Epiphany Tool.
* The base of the card is made from white cardstock, and "Cloud 9 Botanical Notes"
 
Photobucket

FREE YOUR IMAGINATION BY CATHI


Cathi again back with another layout featuring Molossi's Butterfly Frame and Banner chipboards and lots of beautiful Manor House flowers. I wanted a windswept photo to go with my idea of spreading feathers across the layout and I just love this adorable one of my two girls here in Ireland up on a windswept hill when they were little!


I love the new banner chipboards in my latest DT pack. I painted this one in Antique Linen Distress Crackle Paint and inked the edges in Walnut Stain Distress Ink... I also inked over the whole chipboard piece lightly to bring up the crackling!  The gorgeous Small Butterfly Frame was painted in Dusty Concord Distress Crackle Paint.  I also stamped some paint splats and harlequin patterns using Shaded Lilac Distress Ink.


I chose to use the Manor House Believe paper Make Believe for the base of my layout and some of their gorgeous flowers in purples: the Purple Vine and the Razzles Card Pack - Purple. I stamped gorgeous Visible Image feathers using gold embossing powder, layering lots of background stamping across the page. I finished off the layout with a few Prima feather resins.

I really like how my layout turned out, and I thank you so much for stopping by and having a look! Check below for all the gorgeous products used here in the retail store!

Butterfly Frame Small  Vine - purple  Razzles Card pack - Purple  Make BelieveDistress Ink Pad - Shaded LilacDistress Ink Pad - Walnut Stain

Photobucket

Wednesday, 5 February 2014

A HAPPY HELLO !!

Hi Everyone, over the next few days you will be seeing creations from our 3 new DT members!  Don't forget to go and visit their blogs!


It's Honor here, sharing a card that could be used for so many occasions.
 
I had a lot of fun with this card.
 

* Card base is white cardstock
* Background splats using "Funky Fucshia" Dylusions
* Molossi paper straws
* Japanese Washi Tape Design #12
* Japanese Washi Tape Design #23
Other products used;
* Shamrock Green flowersoft and pink/white twine
 
 
Photobucket

Sunday, 2 February 2014

LOVE CREATING WITH CHIPBOARD?? DT TEAM CALL


CHIPBOARD DESIGN TEAM CALL
With our chipboard being much of our focus this year we have decided it was time to call our 2014 Design Team - we need 3 Designers to play with our designs.
Applications are now open.
We are in search of 3 talented designers to help showcase and demonstrate on a monthly basis our chipboard range.  If this Designer title sounds like you and you would like to join us in  2014, please email us at info@molossi.com.au

What we need from you for your application is 3 of your best pieces using chipboard.  Applications are open to Australia and International Designers.


If successful we need you to:
Be able to commit for  12 months to the team.
Sign a Design Team contract - terms and Conditions thoroughly outlaid.

Submit minimum 3 design pieces each month.
Draft the blog post on our blog for scheduling
Be prepared for your designs to be used in classroom kits and resale.
Social networking is required (any problems with this please provide this with your application).
As  Design Team member you will be asked to actively promote the products we have on offer. 
Take high quality, clear, respectable photos of work in .jpg format.
Access to a good scanner, or the ability to take a good picture of your project is also a must.  Without these items  we will not be able to see the fine detail in your work.

Provide you monthly products at no cost, Molossi will pay the shipping and handling on your Design Team supplies.  In return for supplies, we retain the right to display your work in our galleries after your term ends.
Recognition and promotion of your skills and creativity.
Purchasing from Molossi at wholesale prices for your duration as a Design Team Member.
First in on new products coming our way.

So for now we leave it in your hands, applications close April 5th 2014. Designer announced April 20th, 2014.  Designing commences May 1st, 2014.
Photobucket