Saturday, 26 October 2013

SOME MORE DT INSPIRATION FOR YOU

Hi everyone - Marelle back with more fabulous DT inspiration.
Take a look at this gorgeous layout from the lovely Jo.
 
 
This month I was lucky enough to have a gorgeous scripty title "Believe" in my package from Molossi along with a very intricately cut flourish frame.  I have used both of these pieces on my layout for this month featuring my daughter.

The photos I pinched from my daughter's IPOD whilst doing a backup recently and she does a much better job than I do of photo editing :)  I simply painted the chipboard with white acrylic paint and added an adhesive gem to the dot on top of the "I".  The papers I have used are from Echo Park and Kaisercraft and the quote is onto a Bella transparency.  Flowers are from www.scrapofdifference.com.au and Bo Bunny, the spotty paper was cut on the Pazzle into a shape and inked around the edges with black ink.  Some florist wire twirled around a pencil gives the added pieces to the floral cluster.
 
I have hidden journaling under the larger of the photographs with a little washi tape down the side and a metal corner to make sliding it from under the photograph easier.

I absolutely adore this title - it is a great size to make a statement but not overwhelm the layout - similiarly, the frame was small enough to highlight a wallet size photograph and still have it be the smaller of the two photographs featured - I look forward to playing with others in the Molossi range.
 
This is beautiful Jo!
As more gorgeous DT creations come to hand I will keep you updated
 
 
Photobucket

I AM BACK WITH MORE DT YUMMINESS FROM EVE

 
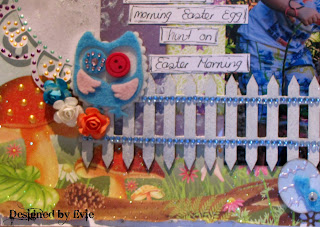
Take a look at another detailed layout from the lovely Eve!  I adore her fussy cutting, her use of bling and how she alters Molossi products!


Molossi products used
Molossi pattern paper by Hobby Fun Co
Molossi chipboard fence
Molossi mulberry paper roses
Molossi sticky bling
 
Other products used
Basic Grey Felties Owl Butterfly and Snail
Bazzill cardstock
Marther Stuart punch
Silhouette cut doily
Liquid Pearls
WOW Glitter

I will be back soon with more DT inspiration!


Photobucket

MORE PINK INSPIRATION FROM EVE!!

 
 Wow Eve you blew me away with this one!


Molossi products used : Manorhouse Feather Flower!  Eve created this gorgeous layout for Once Upon A Sketch challenge site.

Wednesday, 23 October 2013


Hi everyone, I am back with an amazing layout by the talented Leanne Nankervis!  I have known Leanne through scrapbooking (in real life) now for some years - her style is amazing - especially her fussy cutting, vintage layouts - I am in awe of these!
This is what she had to say about this gorgeous layout featuring Molossi products:


I created this layout using the awesome Molossi large doily chipboard frame as a feature on my page. Seeing I was using Graphic 45 Steampunk papers the Molossi cogs went perfect with this range of papers. I did lots of layering and fussy cutting in this layout and embellished it with metal hardware, chipboard and flowers.
The Molossi Large Doily Frame  I painted in Ranger metallic copper paint dabber.
 
 
Molossi Products: - Small Roses- Large Chipboard Doily- Steampunk Cogs
 
Other Products used: - Graphic 45 papers, metal hardware, Petaloo flower, trim 
Photobucket


Monday, 21 October 2013

SOME MORE DT YUMMINESS!!

 Cathi's work is outstanding and always has so much detail!  She has incorporated some Molossi chipboard in this magnificent layout!


Photobucket

Monday, 14 October 2013

A BEAUTIFUL LAYOUT FROM EVE


Eve has showcased the chipboard circle frame by Molossi beautifully!
 
Products Eve has  used are :
Molossi chippy frame
Iam roses flowers
Cottage Cutz Die to create the leaves
Home made spray mists
Paint
Inka Gold
 
 
Just love Eve's work !
Photobucket

More inspiration from our Fabulous DT

Just look at this gorgeous Dusty Attic altered Caddy that Narelle has altered.
 
 
This is the raw Dusty Attic caddy "the before" photo:
Take a look at the "after photo"


This is what Narelle has to say about creating this gorgeous caddy.
This month I altered the Dusty Attic Tool Caddy.  I'm going to use it to store all my adhesives as its the perfect size for my Helmar glue bottles etc, but as I was altering it I kept thinking of ideas for Christmas presents.... doing it up for a teen girl filled with hair styling products and tools, a desk caddy for a special teacher, a caddy for beside the phone to store pens and paper etc.... so many uses!

I assembled the caddy, using some Helmar tacky craft glue to ensure it all stayed together-  then painted it with several coats of paints.   I randomly swiped brown ink over it and wiped it back off to give it an aged look, and ran the brown ink around all the edges and handles.  I used a floral stamp with rust and green ink to add some colour.  I covered the two ends with floral paper, using x-press it double sided tape then dry brushed paint over the top to tone it in with the rest of the caddy and added some brown ink to the edges.

Once everything was dry I decorated the front using gorgeous Manor house flowers- Wishes "Peace"  and Wild Rose Mix which I adhered using Helmar 450 glue and Helmar Liquid Scrap Dots.  I also added some Dusty Attic Dusty Rose leaves.


Molossi Products Used:-
Dusty Attic Tool Caddy
Manor house flowers- Wishes "Peace"
Manor house flowers-  Wild Rose Mix
Dusty Attic Dusty Rose leaves
Helmar tacky craft glue
X-press it double sided tape
Helmar 450 glue
Helmar Liquid Scrap Dots
.
 
Other Products Used:-
Sullivans Paints
Versamark Ink
Kaisercraft Paper


Photobucket

I am loving all this gorgeous Molossi DT inspiration!

Another share from the gorgeous Cathi!
Just take a look at this amazing layout !  I spy some Molossi chippy there (hexagon),and how about that amazing Molossi butterfly - Cathi covered it in stamping with white embossing powder and inked it - it just shows how versatile Molossi chipboard is . Heavenly..


Photobucket

MORE INSPIRATION - USING MOLOSSI CHIPBOARD

 
Take a look at these gorgeous cards by Cathi using Molossi chipboard. This is how Cathi created the first card! 
"I used Molossi's Small Dress Form #1. It is so intricately cut out I couldn't cover up the chipboard in thick paint so I used gorgeous chalk ink for great coverage and color! I added a quick sentiment some coordinated cut out pieces and paper from Tilda Summer Blues and some gorgeous velvet ribbon in my stash! Simple and elegant, I just love the touch Molossi chipboard adds!


My second card also features the Tilda papers, this one reminds me of a china plate setting. I added a small key from the chipboard Door Handles and Keys set, a doily and some more ribbon and twine. Simple and elegant with a fun French greeting!
 
Molossi chipboard can be used in so many types of paper crafting, like my recent canvas, cards, layouts and more!
 
 
Photobucket

More Inspiration from our DT


Good Morning everyone!
I am back to share some more gorgeous layouts from our DT.
 
First up we have Leanne's amazing Christmas Molossi Shadow Box, Leanne has used Dusty Attic chipboard and MME papers.
 
 
Christmas is getting closer - so why not make a gorgeous shadow box to put on your Christmas table.
 
Just look at all the detail, the nest with the eggs, the scroll beneath the photo, the tag and layering, wow Leanne this is beautiful !!


Photobucket

Friday, 4 October 2013

Hi everyone, I am back again!  I find school photos always hard to scrap, this next layout from Gail Anderson from Narrabri Crat Supplies shows us just how it is done!!
I love the simplicity of this page, showcasing the gorgeous school photo.
here is what Gail has to say about her page.
 
 
I love doing school pages, keeping them simple and focusing on the student photo.
This page was made easy using The Molossi Chipboard School Books.
I coloured these with pigment ink pens.


Photobucket
 Hi everyone
Marelle back again to share some of the talented Eve's layouts with you.


Some close ups of the details!


Eve's attention to detail is incredible - what a fun layout!
 
 
Eve has used the following products:
Molossi Birthday Papers
Molossi Sticky Bling
American Crafts Cardstock
Cuttlebug and Sizzix Dies
Eve's Home Made Spray Mists
Micro Beads
Kaisercraft Banner Stamp


Photobucket
Good morning everyone!
 
I am back with some more inspiration for you - this time from the lovely Heather!
 
Just look at the amazing cards - the detailing is incredible.I adore the colour combination of the fresh white, the pop of yellow ad the black damask print!


Molossi Products
White Glitter Scrapbook Card
Suede flocked A4 Paper
Molossi Bling
Molossi Engagement Chipboard
Manor House Creations Flowers
Helmar Craft Glue


Own Products

Yellow & black card from scrap box
Yellow & Black ribbon
Silver Embossing Powder
Tattered Angels Glimmer Mist

TO MAKE CARD BASE:

-Take a piece of scrapbook card & cut your card 12" x 6"
-Score your card width ways (top to bottom) at 2,4, 8 & 10"
-Using a craft trimmer or craft knife & ruler, cut your card length ways twice from the 2" fold to the 10 fold (it is not critical on how wide the top & bottom sections are, you can use whichever measurements you like to give different effects - I have used a 2" width top & bottom to keep it all even)
-Flip the middle section the out the opposite way to the top and bottom, fold your card up and using a bone scorer (or similar) make sure your creases are crisp then add your embellishments, don't forget to leave a space to write your message!

 
I am sure you will agree Heather has certainly "wowed" us once again with her attention to detail and her amazing colour combinations!
 
I will be back with even more DT inspiration very soon


Photobucket

Thursday, 3 October 2013


Hi everyone, Marelle here.
 Hope you are all doing well - what fabulous crafty weather we are having in Victoria!  Winds of 142km per hour - "I don't think we are in Kansas anymore Toto"!!
 
 One of our amazing DT has been taking advantage of the cold wintery conditions, you will be amazed at what she has created!!


Narelle has done an amazing job of these cute Dusty Attic birdhouses.  Here is how she went about creating them.  I know once you see them you will want to start creating decorated birdhouses from Dusty Attic - we would love to see your creations!
 
"These Dusty Attic birdhouses were so much fun to play with and you could decorate them to suit any theme! "

For the first one I inked the pieces with brown ink, concentrating the ink on the outer edges. I covered the roof with a single piece of woodgrain paper and used a fence and bird sticker to decorate around the bottom of the house, and added some ManorHouse roses.

For the purple house I assembled the house first then painted it mauve, followed with a coat of lilac paint.  Whilst the paint was still wet I heated it with a heat gun (getting up quite close) so that the paint bubbled and gave a weathered appearance).  I die-cut scalloped shapes from woodgrain paper to create the tiled roof, before adding molossi rainbow sticky bling and Manorhouse flowers.

For the final house I wanted to create a Christmas feel (imagine how cute these would look hanging on a Christmas tree?!).  For this one I covered each of the pieces in patterened paper, cut them out with a craft knife and then glued the piece together using Helmar tacky craft glue before adding the Manorhouse"Extravagent' bling trim, Molossi Silver bling and  Manorhouse flowers." 

Other products used:-
Simple Stories Patterned papers and stickers
MFT dienamics die
Tim Holtz Distress ink
Jo Sonjas paints


Photobucket